Self-initiated · Electronics class final · 2025
Truck Window Retrofit

What it is
My truck has manual crank windows. Ten full rotations to open or close one. Cranking while driving is a genuine safety hazard. So I retrofitted the driver's side window into a fully functional power window. It uses an arduino, relays, motor driver, current sensing, and a custom 3D-printed spindle adapter, integrated directly into the car's electrical system.
It works. Every time I turn the key and press the button, the window moves. No laptop connected, no external power supply. The Arduino boots with the ignition and runs in the background like a factory system.
How it works
The system has two distinct circuits: the motor control circuit and the car integration circuit.
Motor control uses an Arduino Uno, a BTS7960 H-bridge motor driver, a 20A Hall current sensor, and two push buttons. The H-bridge gives full directional control: LPWM high spins the motor one way, RPWM high reverses it. The current sensor is how the system knows when to stop: when the window hits the end of its travel, the motor stalls and current spikes to ~25A. The Arduino reads that spike and cuts the motor automatically, no position tracking needed.
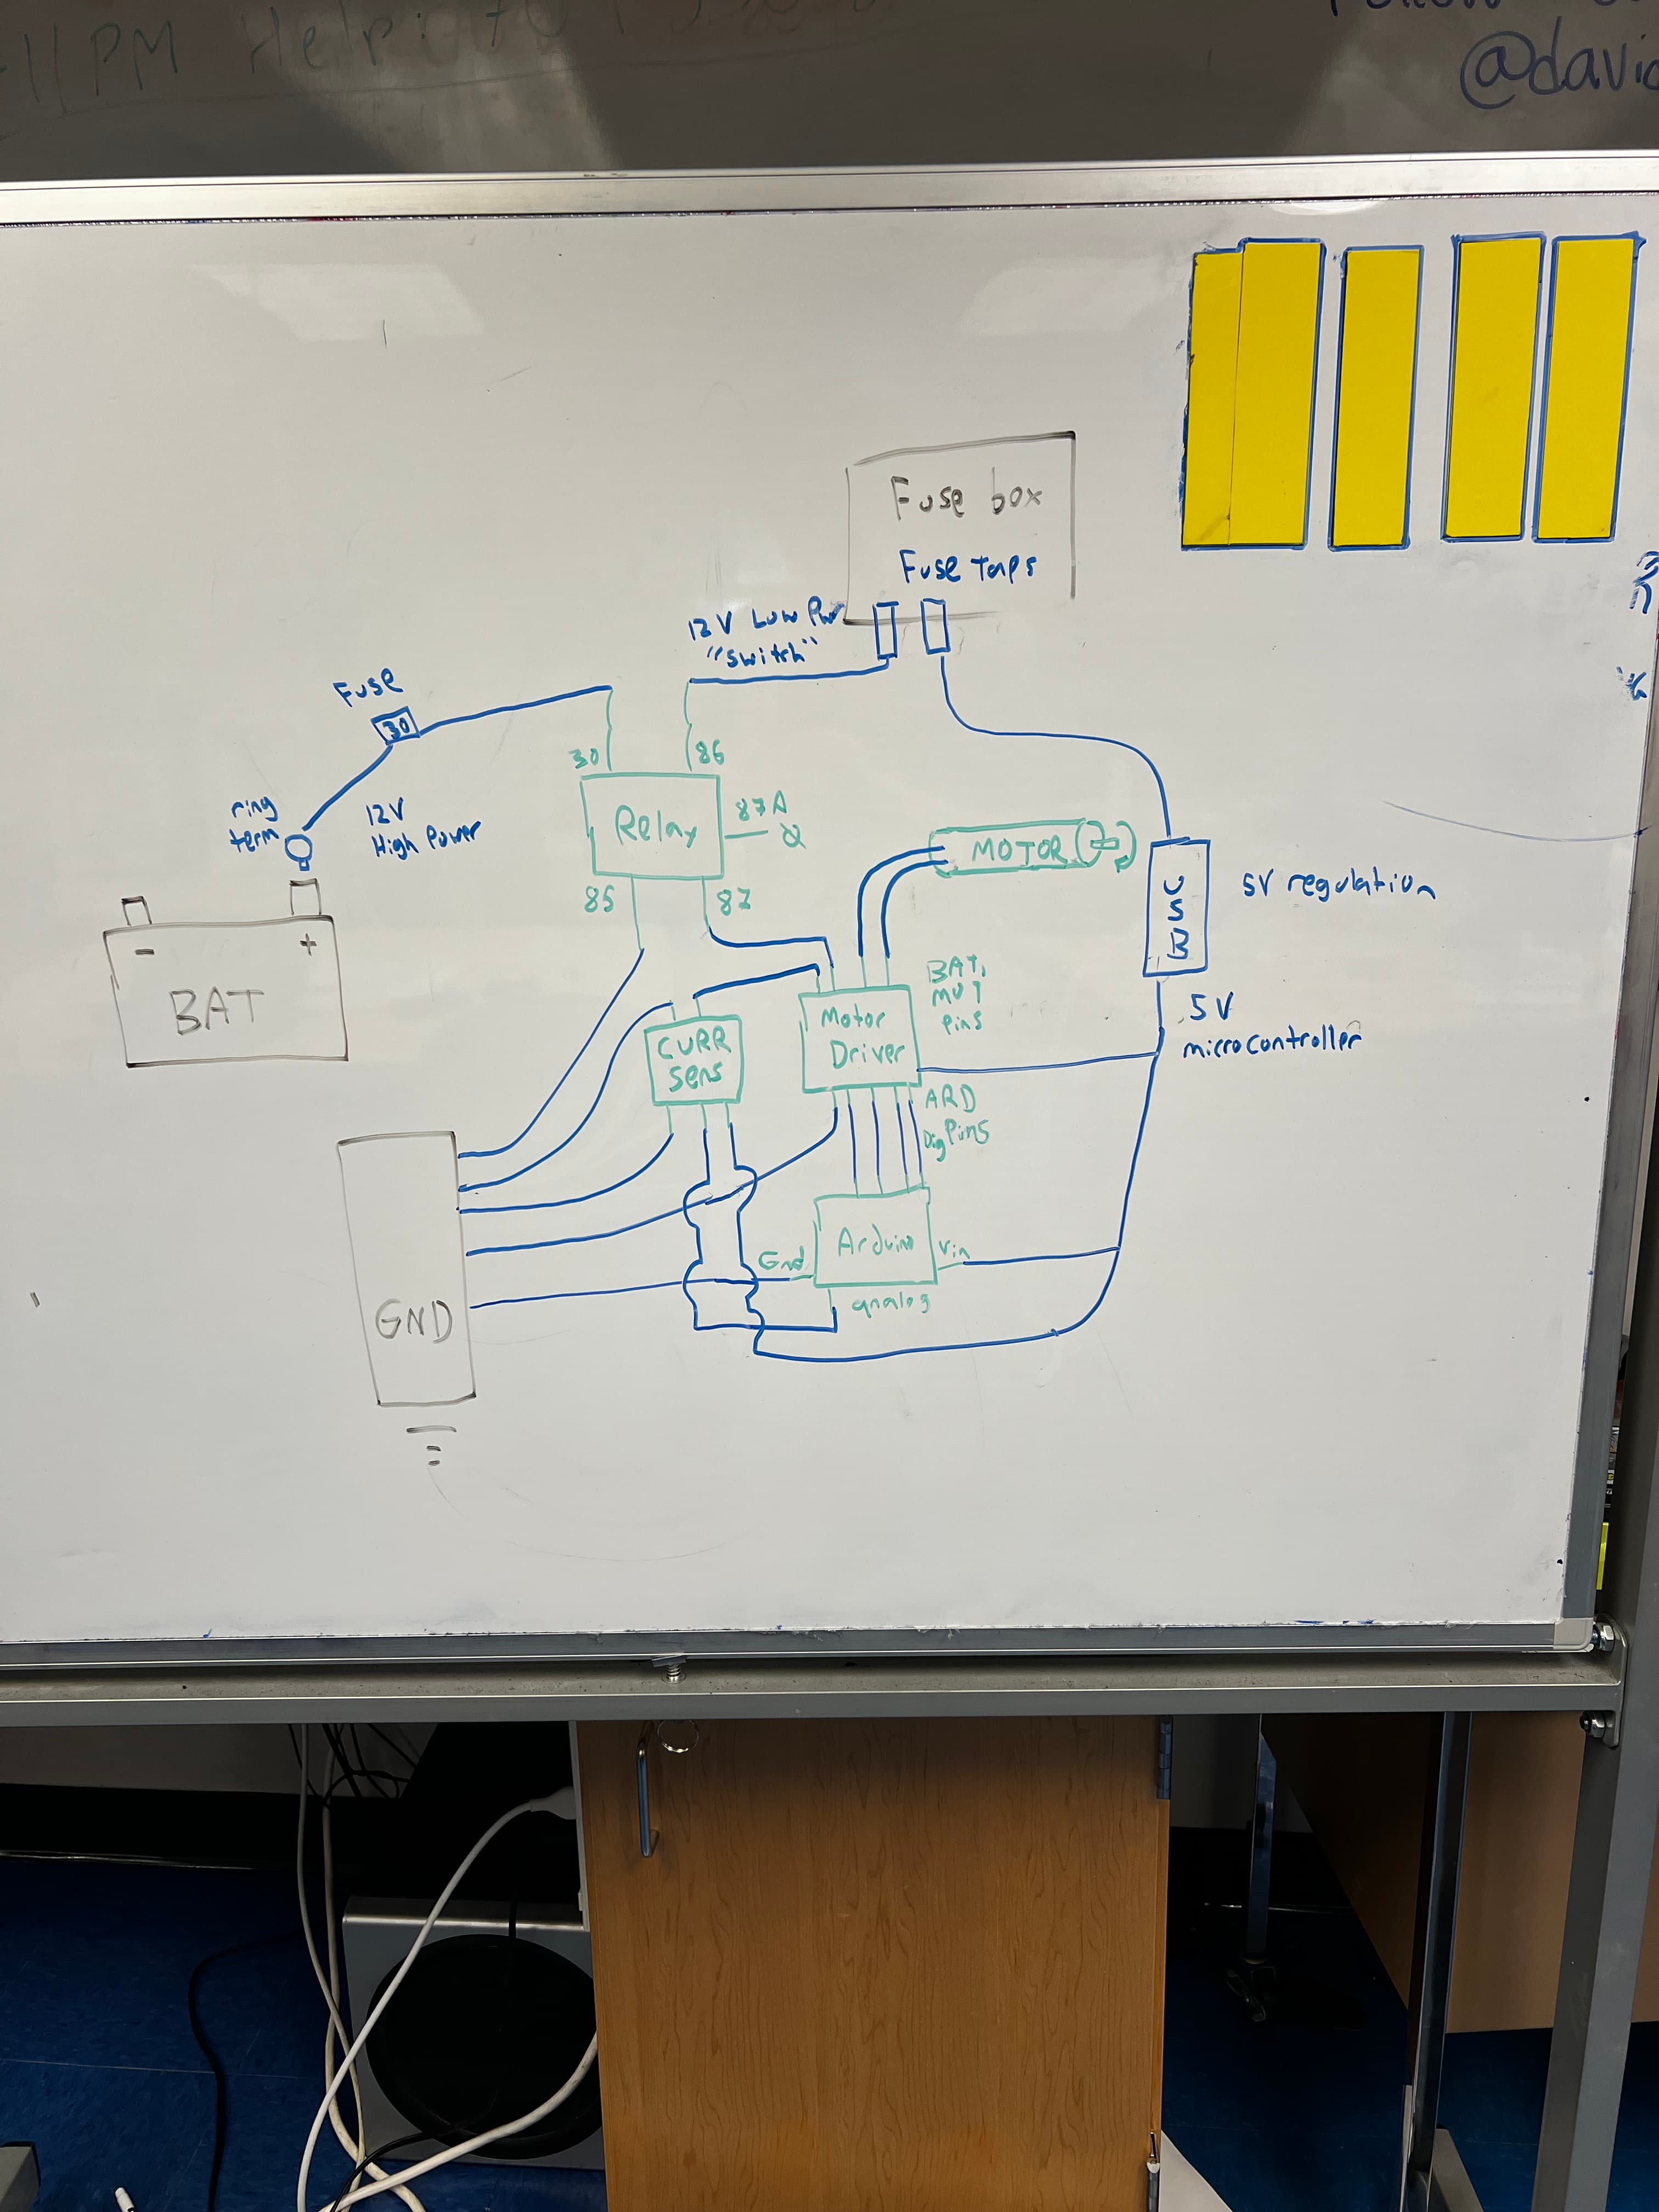
Car integration was the harder problem. The motor draws up to 25A under stall, which is far too much to tap into any existing circuit. The solution: a 40/30A relay that only connects the motor to the car battery when the ignition is on, protecting both the battery and every other circuit in the car. A fuse tap into the fuse box supplies the low-power 12V control line. A cracked-open cigarette lighter adapter steps that down to 5V for the Arduino and sensors. A 30A inline fuse on the high-power line is the last line of defense if anything surges.
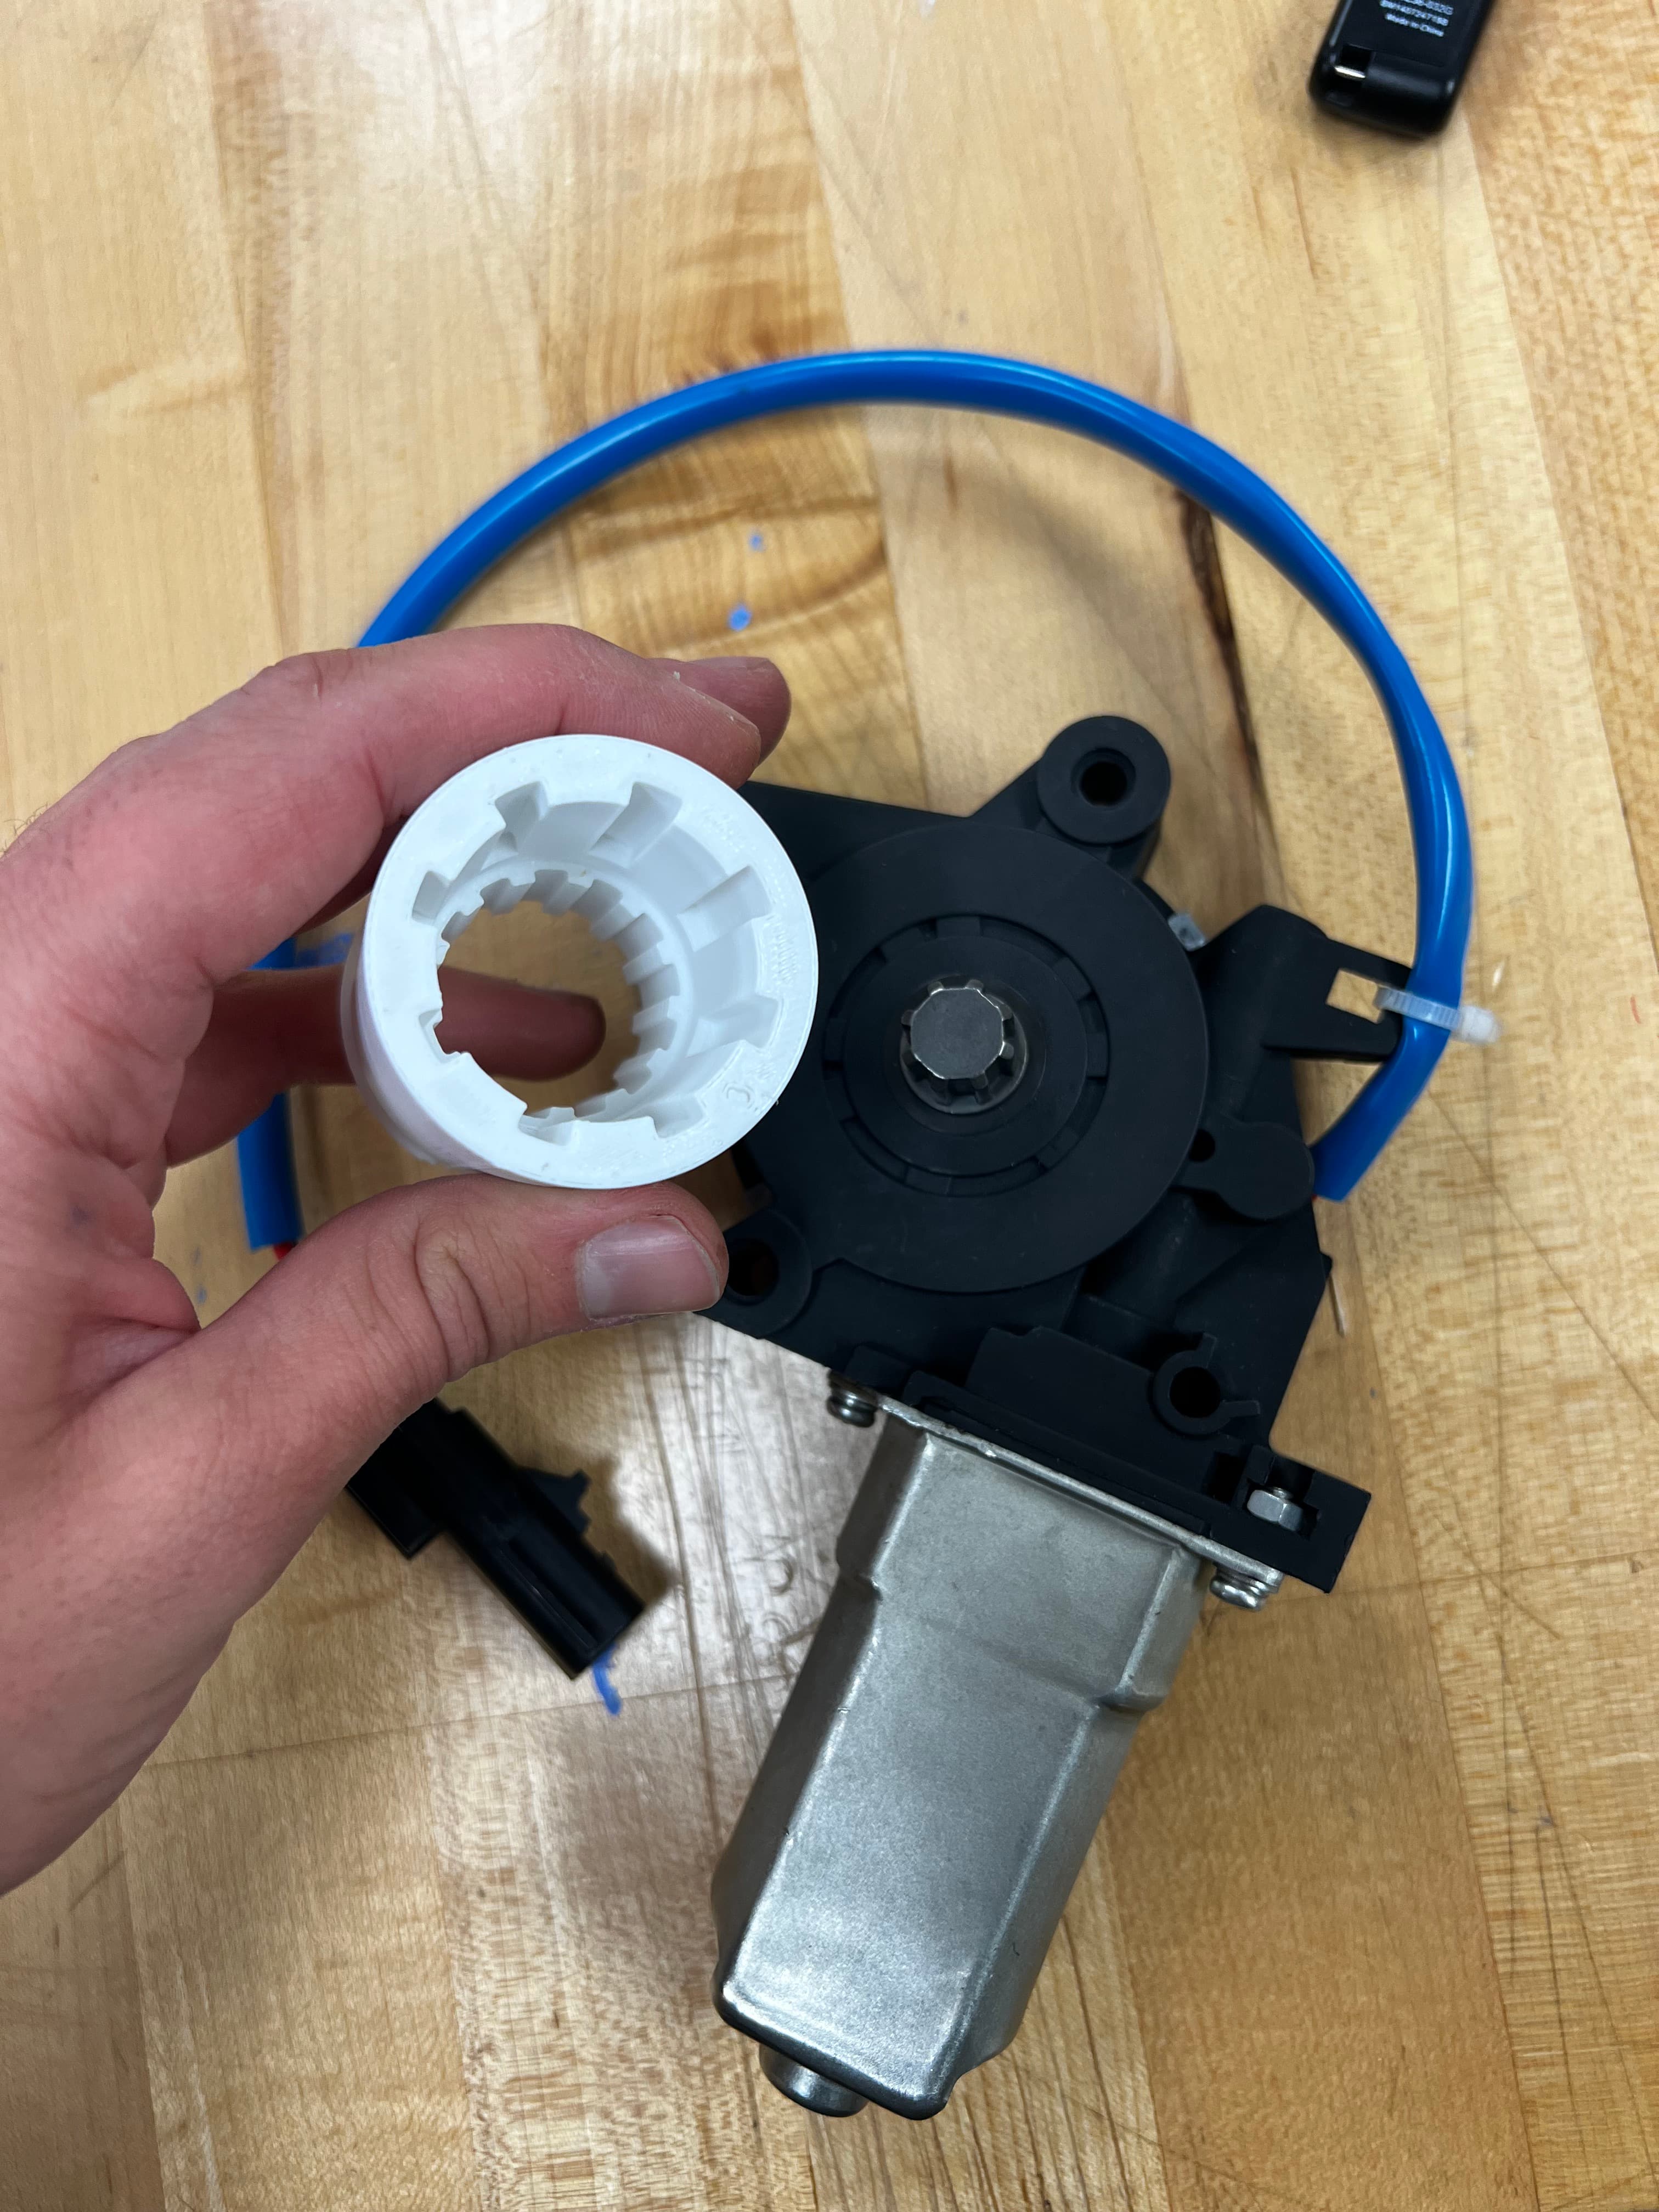
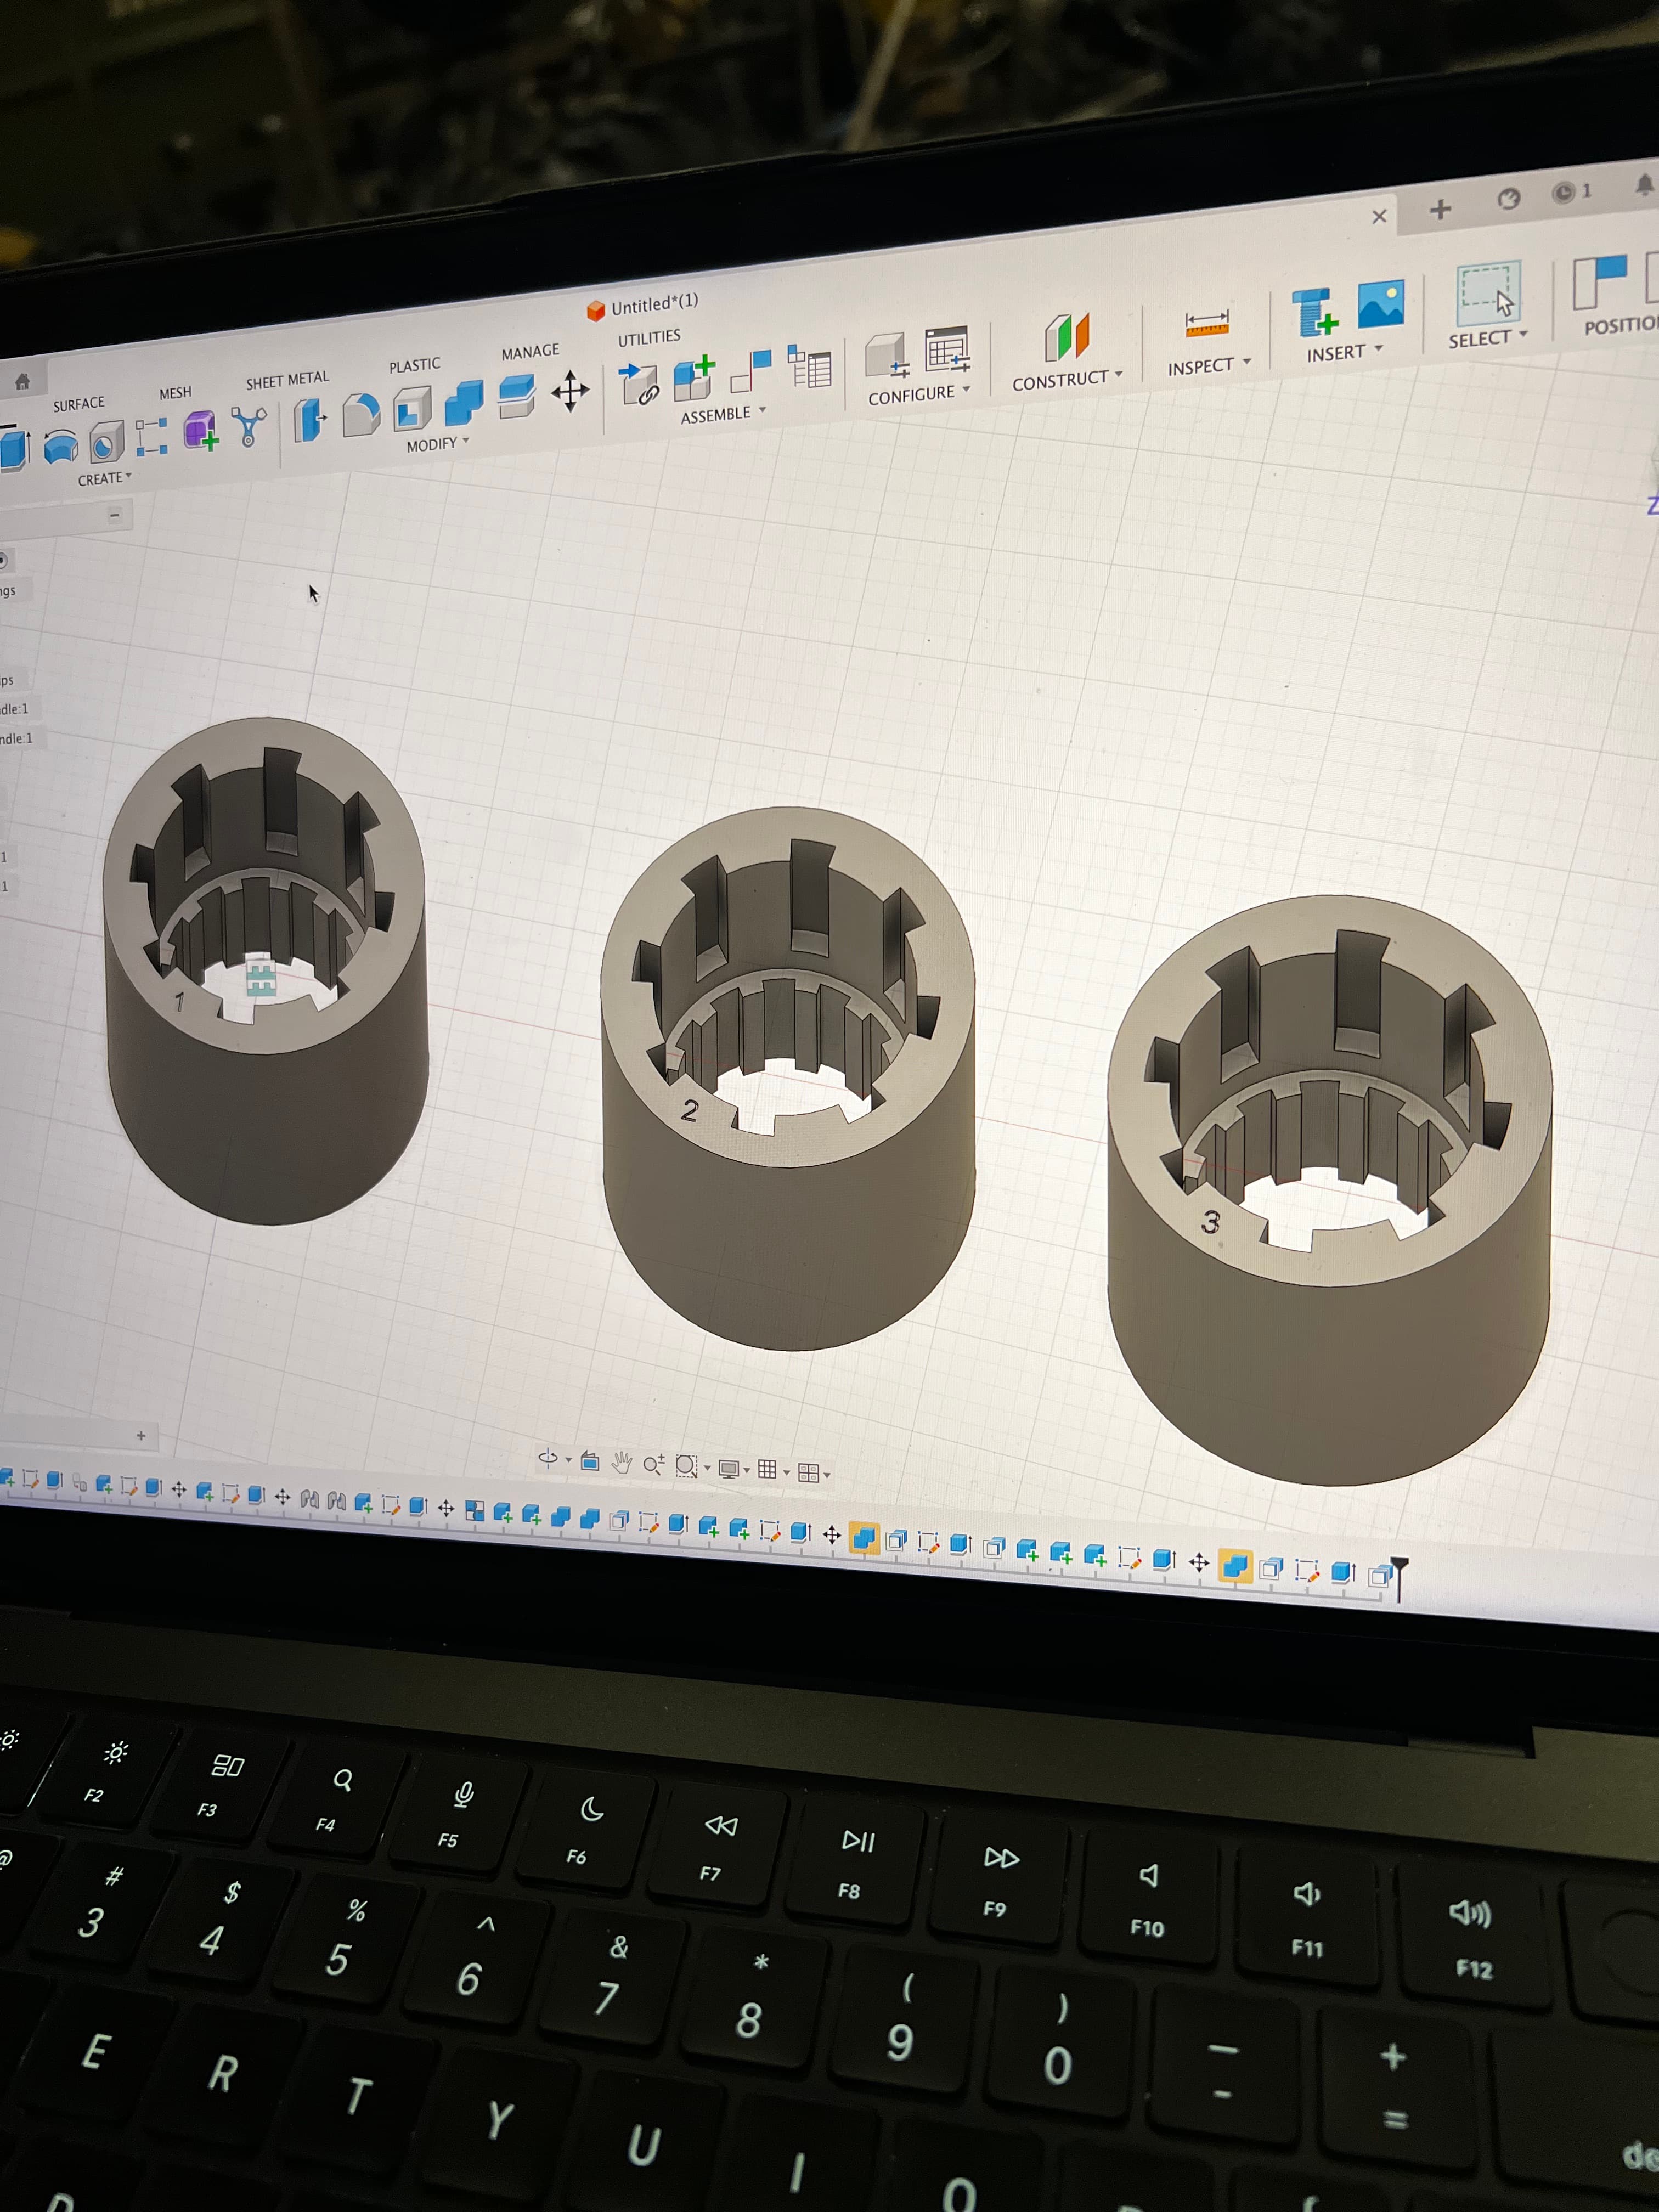
The motor spindle didn't match the manual crank spindle, so I modeled an adapter in Fusion 360 and printed five versions with slightly different press-fit tolerances until one held.
What went wrong
Almost everything, at some point.
Finding the right fuse tap location took trying 30 different fuses. Almost every fuse in my car stays hot regardless of ignition state. The one that finally worked, “cluster overhead electric”, I found through pure trial and error with a multimeter and a lot of patience.
The spindle adapter was the closest I came to quitting. I was nearly finished when I realized the motor spindle and the manual crank spindle had no obvious way to couple. A gear train was too complex to mount cleanly. Welding would destroy the motor internals. The actual solution came from changing my assumption: I had been trying to hide the motor inside the door panel, which was creating the constraint. Once I decided to mount it externally, a simple 3D printed adapter solved the whole problem. I printed five versions to nail the press fit tolerance.
Routing wires through the door took hours. Zip-tied bundles, soldered ground commons, a flood light to find the holes. Not glamorous, but it works.
What's next
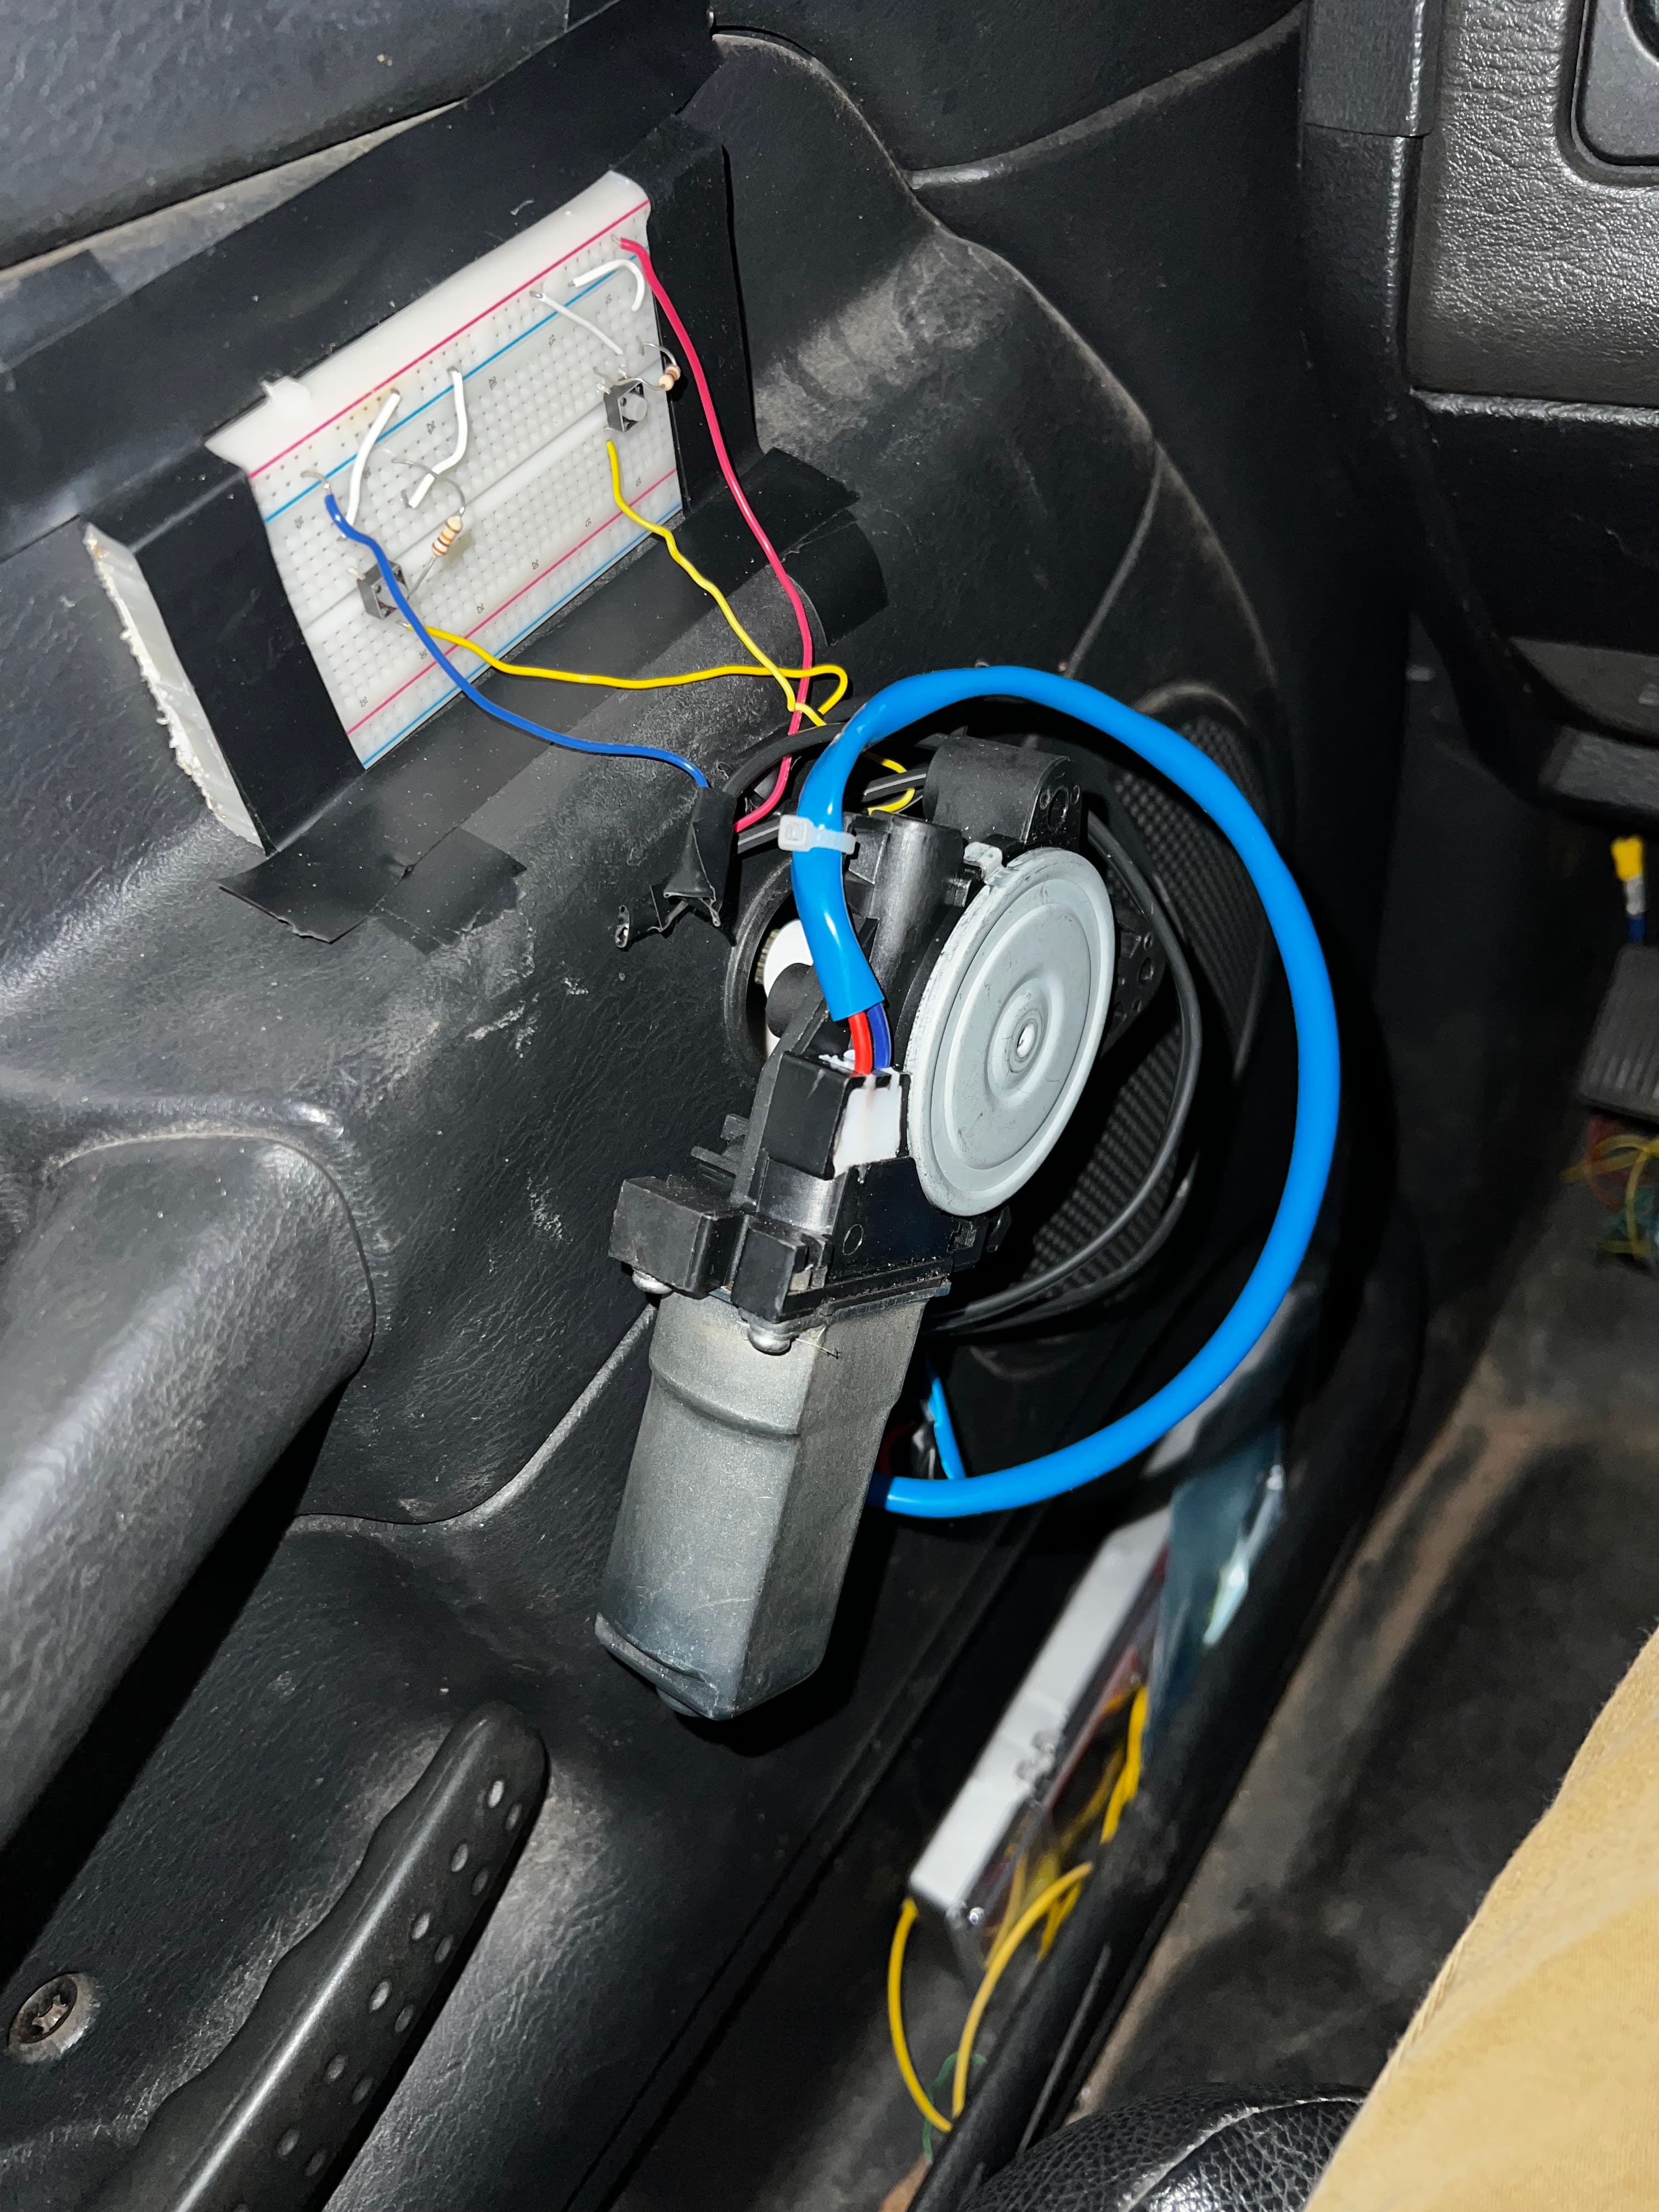
The control electronics are currently zip-tied to the floorboard. The real next step is consolidating everything onto a single custom PCB that tucks into the footbox — cleaner, more reliable, and a good excuse to design another board.
I also want to replace the breadboard-mounted buttons with proper automotive switches, ideally two-stage like factory power windows, where a half-press moves to a precise location and a full press rolls all the way up or down. The current sensor already detects end-of-travel stall current, so the auto-up/down logic is mostly a software change.
Eventually: passenger side too.